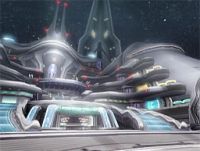
The Big Push/R
Armed Servants at the confinement device on Neudaiz have reported a large-scale attack by SEED-Forms. Protect the photon generator terminals.
ニューデイズの封印装置でジェネレータ設置作業の警護をしている教団警衛士からSEEDフォーム大量発生の報告があった。迫り来るモンスターを迎撃し、フォトンジェネレータの端末を死守せよ!!
| The Big Push/R 極幻の大攻勢/R | |
|---|---|

| |
| Start Lobby | Resident Security Department |
| Start Counter | GAM Counter |
| End Lobby | Resident Security Department |
| Version | Clementine |
| Field | Habirao RELICS |
| Party Size | 1-4 Players |
| Enemy Elements | |
Mission requirements and rewards
| LV | Req. LV | Enemy LV | Rank S | Rank A | Rank B | Rank C | ||||
|---|---|---|---|---|---|---|---|---|---|---|
| Meseta | Points | Meseta | Points | Meseta | Points | Meseta | Points | |||
| GAM | 180 | 190 | 390 4 PA Fragments |
36000 | ? | ? | ? | ? | 0 | 0 |
| Mission restrictions | ||||||||||
| Failure if defense gauge is depleted. | Failure if returning to the lobby after incapacitation. | |||||||||
Mission details
- Your goal is to prevent the creatures from reaching the specified area.
- The blue area on your radar is the area to be defended. If it's invaded, it will turn red.
- If an invaded area remains red for three seconds, the defense gauge on the right side of the screen will go down. After ten times, the defense gauge runs out and you will have failed.
- By defeating creatures and moving to a new block, your depleted defense gauge will be fully restored.
- After defeating all creatures, you'll receive bonus containers depending on how much of each block's defense gauge remains. Each block's defense gauge has ten units. For each block with at least five units remaining, you'll qualify to receive a bonus container.
- Selecting to return to the lobby after becoming incapacitated will render the mission a failure.
- By accessing nearby switches, you can activate a laser fence that will repel creatures for ten seconds. If there are creatures inside when the switch is activated, however, you may increase your risk.
- Once a switch is accessed, it cannot be reused until one minute has elapsed. But as long as enough time has passed, there is no limit to the number of times a switch can be used. If a switch is surrounded by a yellow aura, it can be accessed.
- If you fail to hold off the invasion and your defense gauge is depleted, the energy contained in the photon generator will cause an explosion that will encompass the entire area and cause severe damage. There is a danger of the player becoming incapacitated, so take note of your defense gauge.
Enemy information
| Enemy | Enemy Buffs | Ele. | Special Drops | Enemy Drops |
|---|---|---|---|---|
| Block 1 | ||||
| Ageeta | x | Karakasa Jikomi | ||
| Ollaka | Ollaka Meat | Yuzu & Iyokan | ||
| Ubakrada | Ubakrada Neck | Fighting Lord | ||
| Enemy | Enemy Buffs | Ele. | Special Drops | Enemy Drops |
| Block 2 | ||||
| Galdeen | x | Dark Falz Dust | ||
| Deljaban | [B] Del Jagnus [B] Deljabaner Deljaban Blade |
Gerard / Endurance | ||
| Dilnazen | Dilnazen Arm [B] Twin Dil Edge/Z |
Kusanagi | ||
| Enemy | Enemy Buffs | Ele. | Special Drops | Enemy Drops |
| Block 3 | ||||
| Rappy Polec | White Glove | Neudaiz Madog | ||
| Olgohmon | x | Wicked Solferino | ||
| Tengohg | Tengohg Ala | Gabridant | ||
| Jaggo | Jaggo Delma Meow Mustache |
Chigaheshi | ||
Area/Box Drops
- The amount AMP Spheres rewarded is based on the gauge level upon completion. 5 bars or higher remaining on the gauge will award the maximum of 4.
- A perfect clear (no bars lost on the gauge) will award extra AMP Crystals.
| Enemy | Special Drops | Area/Box Drops |
|---|---|---|
| Clear Box | - | 1x - 4x AMP Sphere ?x AMP Crystal |
| Area Drops (RELICS) | Beetle Stag Beetle Tornado Throw Relic Edge Ban-, Gra- Photons [B] Rutsularod/Z |
Chronoseline Paural Brahma Skystone ishana Sourcestone Demonblade Grinder Base S Grinder S+1-5 |
